



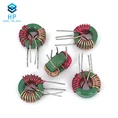

Hey there! As a choke coil supplier, I've seen my fair share of issues with these little guys. Choke coils are super important in a bunch of electrical circuits, helping to block high-frequency AC while letting DC pass through. But when they go bad, it can be a real pain in the neck. So, in this blog, I'm gonna walk you through how to troubleshoot a faulty choke coil.
Understanding the Basics of a Choke Coil
Before we jump into troubleshooting, let's quickly go over what a choke coil is. A Choke Coil is basically an inductor that's designed to have a high reactance at a specific frequency. It's made up of a coil of wire wound around a core, which can be made of different materials like iron or ferrite.
Choke coils come in different types, like air-core, iron-core, and ferrite-core. Each type has its own characteristics and is used in different applications. For example, air-core choke coils are often used in high-frequency circuits because they have low inductance and low losses. On the other hand, iron-core and ferrite-core choke coils are used in low-frequency circuits because they have high inductance and can handle more current.
Signs of a Faulty Choke Coil
The first step in troubleshooting a choke coil is to figure out if it's actually faulty. Here are some common signs that your choke coil might be bad:
- Overheating: If the choke coil is getting too hot, it could be a sign of a short circuit or excessive current flowing through it.
- Noisy Operation: A faulty choke coil might make a buzzing or humming sound, especially if it's vibrating due to loose windings or a damaged core.
- Poor Performance: If the circuit that the choke coil is part of isn't working properly, it could be because the choke coil isn't doing its job. For example, if you're using a choke coil in a power supply and the output voltage is unstable, it could be due to a faulty choke coil.
- Visible Damage: Sometimes, you can tell that a choke coil is faulty just by looking at it. If the wire is broken, the insulation is damaged, or the core is cracked, then the choke coil is definitely bad.
Tools You'll Need
To troubleshoot a choke coil, you'll need a few tools. Here's what you'll need:
- Multimeter: A multimeter is a must-have tool for any electrical troubleshooting. You can use it to measure the resistance, inductance, and continuity of the choke coil.
- Oscilloscope: An oscilloscope is a more advanced tool that can be used to measure the voltage and current waveforms in the circuit. It can help you identify any abnormal signals or frequencies that might be causing the problem.
- Insulation Resistance Tester: An insulation resistance tester is used to measure the resistance of the insulation between the wire and the core of the choke coil. If the insulation resistance is too low, it could be a sign of a short circuit.
Step-by-Step Troubleshooting Process
Now that you know what to look for and what tools you'll need, let's go through the step-by-step troubleshooting process:
Step 1: Disconnect the Power
Before you start troubleshooting, make sure to disconnect the power to the circuit. This will prevent any electrical shocks or damage to the equipment.
Step 2: Inspect the Choke Coil
The first thing you should do is visually inspect the choke coil for any visible damage. Look for broken wires, damaged insulation, or cracked cores. If you find any damage, then the choke coil is definitely bad and needs to be replaced.


Step 3: Measure the Resistance
Use a multimeter to measure the resistance of the choke coil. Set the multimeter to the resistance mode and connect the probes to the two terminals of the choke coil. The resistance value should be within the specified range for the choke coil. If the resistance is too high or too low, it could be a sign of a problem.
Step 4: Measure the Inductance
Use a multimeter or an LCR meter to measure the inductance of the choke coil. Set the meter to the inductance mode and connect the probes to the two terminals of the choke coil. The inductance value should be within the specified range for the choke coil. If the inductance is too high or too low, it could be a sign of a problem.
Step 5: Check the Insulation Resistance
Use an insulation resistance tester to measure the insulation resistance between the wire and the core of the choke coil. Set the tester to the appropriate range and connect the probes to the wire and the core of the choke coil. The insulation resistance value should be within the specified range for the choke coil. If the insulation resistance is too low, it could be a sign of a short circuit.
Step 6: Check the Voltage and Current
Use an oscilloscope or a multimeter to measure the voltage and current waveforms in the circuit. Look for any abnormal signals or frequencies that might be causing the problem. If you find any abnormal signals or frequencies, then you'll need to further investigate the cause of the problem.
Step 7: Replace the Choke Coil
If you've gone through all the steps and you've determined that the choke coil is faulty, then you'll need to replace it. Make sure to choose a choke coil that has the same specifications as the original choke coil.
Other Considerations
Here are some other things to keep in mind when troubleshooting a choke coil:
- Environmental Factors: The performance of a choke coil can be affected by environmental factors like temperature, humidity, and vibration. Make sure to check the operating conditions of the circuit and make sure that the choke coil is being used within its specified range.
- Other Components: Sometimes, the problem might not be with the choke coil itself, but with other components in the circuit. Make sure to check all the other components in the circuit, like capacitors, resistors, and diodes, to make sure that they're working properly.
- Safety: When working with electrical circuits, it's important to follow safety procedures. Make sure to wear appropriate safety gear, like gloves and safety glasses, and make sure to disconnect the power before you start working on the circuit.
Conclusion
Troubleshooting a faulty choke coil can be a bit of a challenge, but with the right tools and knowledge, it can be done. By following the steps outlined in this blog, you should be able to identify and fix any problems with your choke coil.
If you're in the market for a new choke coil or any other type of Antenna Coil or Resonant Coil, we're here to help. We're a leading supplier of high-quality choke coils and other electrical components. If you have any questions or need help choosing the right product for your application, don't hesitate to contact us for a procurement discussion.