


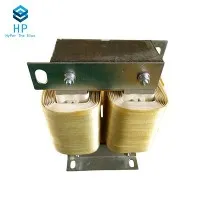

Installing a DC solenoid coil is a process that requires proper understanding and careful execution. As a supplier of DC Solenoid Coils, I'm well - versed in the intricacies of these components and am excited to share a comprehensive guide on their installation.
Understanding DC Solenoid Coils
Before diving into the installation process, it's essential to understand what a DC Solenoid Coil is. A DC solenoid coil is an electromechanical device that generates a magnetic field when an electric current is passed through it. This magnetic field then causes a plunger or armature to move, which can be used to perform various mechanical tasks, such as opening or closing valves, activating switches, and much more.
Compared to AC Solenoid Coils, DC solenoid coils have a more stable magnetic field and are often preferred in applications where precise control and lower energy consumption are required.
Tools and Materials Needed
- Safety Equipment: Safety glasses and gloves are a must - have to protect against any potential electrical or mechanical hazards.
- Screwdriver Set: Different sizes of flat - head and Phillips - head screwdrivers will be needed to disassemble and assemble any mounting brackets or enclosures.
- Wiring Tools: Wire strippers, crimping tools, and electrical tape are required for making proper electrical connections.
- Multimeter: This device is used to measure voltage, resistance, and continuity, ensuring that the electrical connections are correct.
- Mounting Hardware: Depending on the application, you may need bolts, nuts, washers, or brackets to mount the solenoid coil securely.
Step 1: Preparation
- Verify the Coil: Before installation, carefully examine the DC Solenoid Coil for any visible damage, such as broken wires or a cracked housing. Check the specifications of the coil to ensure it matches the requirements of your application, including voltage, current, and power ratings.
- Power Off: Always turn off the power supply to the system where the solenoid coil will be installed. This helps prevent any electrical shocks during the installation process.
- Gather Information: Read the installation manual provided by the manufacturer. It contains important information about the coil's dimensions, mounting requirements, and electrical connections.
Step 2: Mounting the Coil
- Choose the Mounting Location: Select a suitable location for mounting the solenoid coil. The location should be clean, dry, and away from excessive heat, moisture, and vibrations. Ensure that there is enough space around the coil for proper ventilation and access for future maintenance.
- Prepare the Mounting Surface: If the mounting surface is uneven or dirty, clean it and make it flat. You may need to use a file or sandpaper to smooth out any rough areas.
- Attach the Mounting Bracket: If the solenoid coil comes with a mounting bracket, attach it to the coil using the appropriate screws or bolts. Then, align the bracket with the mounting holes on the chosen surface and secure it in place using the mounting hardware. Make sure the coil is firmly mounted and will not move during operation.
Step 3: Electrical Connections
- Identify the Wires: Locate the two power wires of the solenoid coil. These wires are usually color - coded, and the polarity is important. typically, the positive wire is marked with a plus sign or a specific color (e.g., red), and the negative wire has a minus sign or a different color (e.g., black).
- Strip the Wires: Use wire strippers to remove about 1/4 to 1/2 inch of insulation from the ends of the power wires. Make sure not to damage the conductive core of the wire.
- Connect to the Power Source: Connect the positive wire of the solenoid coil to the positive terminal of the power supply and the negative wire to the negative terminal. You can use crimp connectors to secure the wires or solder them for a more permanent connection. After making the connections, wrap the joints with electrical tape to prevent short - circuits.
- Check the Connections: Use a multimeter to check for continuity and proper voltage across the solenoid coil. Set the multimeter to the appropriate voltage range and touch the probes to the power terminals of the coil. The voltage reading should match the rated voltage of the coil.
Step 4: Testing the Coil
- Power On: Once all the connections are made and checked, turn on the power supply. Observe the solenoid coil for any abnormal behavior, such as overheating, excessive noise, or failure to operate.
- Function Test: If the solenoid coil is part of a larger system, such as a valve - control system, test its functionality. For example, if it's a valve - actuating solenoid, check if the valve opens and closes as expected when the coil is energized and de - energized.
- Adjustment: If the solenoid coil does not operate correctly, you may need to make some adjustments. Check the electrical connections again, verify the voltage and current, and ensure that the mounting is secure. You may also need to consult the manufacturer's troubleshooting guide.
Step 5: Final Checks and Maintenance
- Inspect the Installation: After testing, visually inspect the entire installation. Make sure all the connections are tight, the mounting is secure, and there are no loose wires or components.
- Documentation: Keep a record of the installation, including the date, the model number of the solenoid coil, and any test results. This documentation will be useful for future maintenance and troubleshooting.
- Regular Maintenance: Establish a regular maintenance schedule for the solenoid coil. This may include checking the electrical connections, cleaning the coil, and lubricating any moving parts if applicable.
Troubleshooting Common Installation Issues
- No Power: If the solenoid coil does not receive power, check the power supply, fuses, and switches. Make sure the power source is functioning correctly and that the electrical connections to the coil are secure.
- Overheating: Overheating can be caused by incorrect voltage, excessive current, or poor ventilation. Check the voltage and current ratings of the coil and ensure that it has enough space for heat dissipation.
- Mechanical Failure: If the plunger or armature does not move properly, check for any mechanical obstructions, such as dirt or debris. Lubricate the moving parts if necessary and ensure that the mounting is not causing any binding.
Conclusion
Installing a DC solenoid coil is a task that can be accomplished with the right knowledge and tools. By following the steps outlined in this guide, you can ensure a successful installation and reliable operation of the coil. As a supplier of high - quality DC Solenoid Coils, we are committed to providing our customers with the best products and support. If you have any questions about installation, or if you are interested in purchasing our solenoid coils for your project, please feel free to reach out to us. We are here to assist you in finding the perfect solution for your needs.


References
- "Electromagnetic Devices Handbook" by John D. Kraus
- Manufacturer's installation manuals for DC solenoid coils