




Replacing a coil inductor can seem like a daunting task, especially if you're not well - versed in electronics. However, with the right knowledge and tools, it can be a manageable process. As a coil inductor supplier, I've seen firsthand the importance of proper replacement procedures. In this blog, I'll guide you through the steps of replacing a coil inductor, from understanding the basics to the actual replacement process.
Understanding Coil Inductors
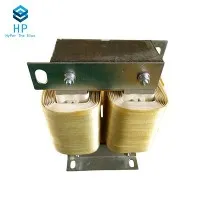
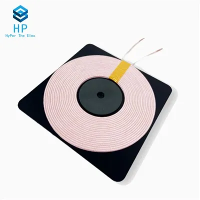
Before we dive into the replacement process, it's crucial to understand what a coil inductor is and how it works. A coil inductor is a passive electronic component that stores energy in a magnetic field when an electric current flows through it. It consists of a coil of wire, usually wound around a core made of a magnetic material such as ferrite or iron.
Coil inductors come in various types and sizes, each designed for specific applications. For example, PFC Inductor is commonly used in power factor correction circuits to improve the efficiency of electrical systems. Filter Inductor is used to suppress electromagnetic interference (EMI) and filter out unwanted frequencies. Toroidal Inductors are known for their high inductance values and low electromagnetic radiation, making them suitable for applications where space is limited and EMI needs to be minimized.
Reasons for Replacing a Coil Inductor
There are several reasons why you might need to replace a coil inductor. One of the most common reasons is component failure. Over time, the wire in the coil can break due to mechanical stress, thermal stress, or corrosion. A broken coil will cause the inductor to lose its ability to store energy in the magnetic field, resulting in a malfunction of the circuit.
Another reason could be a change in the circuit requirements. For example, if you're upgrading a power supply, you might need to replace the existing inductor with one that can handle a higher current or has a different inductance value. Additionally, if you're troubleshooting a circuit and suspect that the inductor is the source of the problem, replacing it can help you confirm the diagnosis.
Tools and Materials Needed
Before you start the replacement process, you'll need to gather the necessary tools and materials. Here's a list of what you'll typically need:
- Soldering Iron: A good - quality soldering iron with adjustable temperature is essential for desoldering the old inductor and soldering the new one in place.
- Desoldering Pump or Wick: This tool is used to remove the old solder from the circuit board. A desoldering pump is a mechanical device that sucks the molten solder away, while desoldering wick is a braided copper wire that absorbs the solder when heated.
- New Coil Inductor: Make sure you have the correct replacement inductor. Check the specifications such as inductance value, current rating, and physical size to ensure it matches the requirements of your circuit.
- Solder: Use a high - quality solder with a suitable melting point. Lead - free solder is commonly used in modern electronics.
- Flux: Flux helps to clean the surfaces and improve the flow of solder during the soldering process.
- Circuit Board Cleaner: After desoldering, you'll need to clean the circuit board to remove any residual solder and flux. Isopropyl alcohol is a common choice for cleaning circuit boards.
- Multimeter: A multimeter can be used to test the new inductor and the circuit before and after the replacement to ensure everything is working properly.
Step - by - Step Replacement Process
Step 1: Power Off and Safety Precautions
Before you start working on the circuit, make sure the power is turned off and the circuit is disconnected from the power source. This will prevent any electrical shock or damage to the components. Wear anti - static gloves to avoid static electricity discharge, which can damage sensitive electronic components.
Step 2: Identify the Faulty Inductor
If you're not sure which inductor needs to be replaced, use a multimeter to test the inductors in the circuit. Set the multimeter to the appropriate resistance or inductance measurement mode and measure the values of each inductor. Compare the measured values with the specifications of the inductor to determine if it's faulty.
Step 3: Desolder the Old Inductor
Heat the soldering iron to the appropriate temperature (usually around 350 - 400°C). Place the tip of the soldering iron on one of the solder joints of the inductor and wait for the solder to melt. While the solder is molten, use the desoldering pump or wick to remove the solder. Repeat this process for all the solder joints of the inductor. Once all the solder is removed, gently pull the old inductor out of the circuit board.
Step 4: Clean the Circuit Board
After removing the old inductor, use the circuit board cleaner to clean the area where the inductor was located. This will remove any residual solder and flux, ensuring a clean surface for soldering the new inductor.
Step 5: Prepare the New Inductor
Inspect the new inductor to make sure it's in good condition. Bend the leads of the inductor if necessary to match the holes on the circuit board.
Step 6: Solder the New Inductor
Place the new inductor in the correct position on the circuit board, aligning the leads with the holes. Heat the soldering iron again and apply a small amount of flux to the solder joints. Then, place the tip of the soldering iron on one of the leads and apply solder until the lead is completely covered with a shiny, smooth layer of solder. Repeat this process for all the leads of the inductor.
Step 7: Test the Circuit
Once the new inductor is soldered in place, let the solder cool down completely. Then, use the multimeter to test the inductor and the circuit. Check the inductance value of the new inductor to make sure it matches the specifications. Also, test the circuit to ensure it's working properly.
Tips and Considerations
- Take Your Time: Soldering is a delicate process, and rushing can lead to poor solder joints or damage to the components. Make sure you take your time and do it carefully.
- Double - Check the Specifications: Before purchasing the replacement inductor, double - check the specifications to ensure it's the right one for your circuit.
- Practice Soldering: If you're new to soldering, it's a good idea to practice on a scrap circuit board first to get the hang of it.
- Keep the Work Area Clean: A clean work area will help you avoid losing small components and make the replacement process easier.
Contact for Purchase and Consultation
If you're in need of high - quality coil inductors for your projects, whether it's for replacement or new designs, we're here to help. As a professional coil inductor supplier, we offer a wide range of inductors with various specifications to meet your specific requirements. Our products are known for their reliability, performance, and competitive prices.


Don't hesitate to reach out to us for more information or to discuss your purchasing needs. We're happy to provide technical support and guidance to ensure you get the right inductor for your application.
References
- "The Art of Electronics" by Paul Horowitz and Winfield Hill
- "Electronics Fundamentals: Circuits, Devices, and Applications" by Thomas L. Floyd